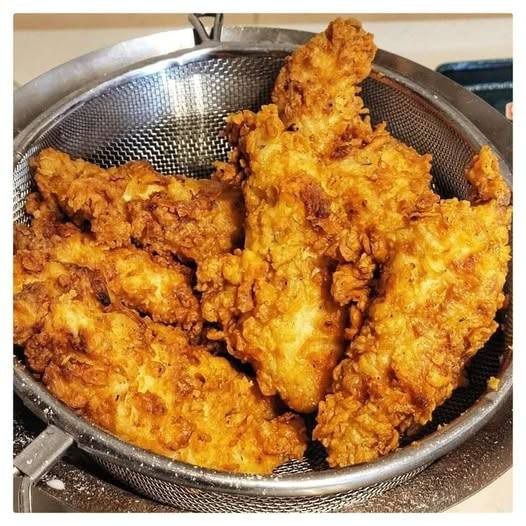
Crispy Buttermilk Chicken Tenders are the gold standard for homemade, juicy, flavorful, and incredibly crunchy chicken. The secret is the buttermilk marinade (which tenderizes and adds tang) and a well-seasoned, crispy coating.
Here’s a foolproof recipe that delivers restaurant-quality tenders every time.
Ingredients:
For the Marinade:
-
1 ½ lbs (about 700g) chicken breast tenders (or boneless, skinless breasts cut into strips)
-
1 ½ cups buttermilk
-
1 tablespoon hot sauce (like Frank’s RedHot, optional but recommended)
-
1 teaspoon salt
-
½ teaspoon black pepper
-
1 teaspoon garlic powder
-
1 teaspoon paprika
For the Dredging Station:
-
1 ½ cups all-purpose flour
-
⅓ cup cornstarch (key for extra crispiness!)
-
2 teaspoons salt
-
1 ½ teaspoons garlic powder
-
1 ½ teaspoons paprika
-
1 teaspoon onion powder
-
1 teaspoon black pepper
-
½ teaspoon cayenne pepper (adjust to taste)
For Frying:
-
Vegetable oil, canola oil, or peanut oil (for deep frying – enough for 1.5-2 inches in the pot)
-
OR for Baking: ¼ cup melted butter or refined coconut oil for drizzling
Instructions:
Step 1: Marinate the Chicken (The Key to Juiciness)
-
In a large bowl or zip-top bag, combine buttermilk, hot sauce, salt, pepper, garlic powder, and paprika.
-
Add the chicken tenders, ensuring they are fully submerged. Seal or cover.
-
Refrigerate for at least 2 hours, ideally 4-8 hours (or overnight). Do not skip this step.
Step 2: Prep the Dredge & Set Up Your Station
-
In a shallow dish (like a pie plate), whisk together the flour, cornstarch, and all seasonings (salt, garlic powder, paprika, onion powder, black pepper, cayenne).
-
Remove the chicken from the fridge. Let it sit at room temperature for 15-20 minutes while you heat the oil.
-
Set up your workstation: Bowl of marinated chicken → Bowl of flour mixture → Clean wire rack or tray.
Step 3: Dredge Like a Pro
-
Take one tender from the buttermilk, letting the excess drip off.
-
Place it in the flour mixture. Press down firmly, then flip and press again to ensure a very thick, clumpy coating. This “clumpy” dredge is what creates the craggy, extra-crispy exterior.
-
Shake off lightly and place on the wire rack. Repeat with all tenders. Let them rest on the rack for 10-15 minutes before frying. This helps the coating set and adhere.
Step 4: Fry to Golden Perfection
-
Heat the oil in a heavy-bottomed pot, Dutch oven, or deep skillet to 350°F (175°C). Use a thermometer for accuracy. The oil should be about 1.5-2 inches deep.
-
Working in batches to avoid overcrowding (which lowers oil temp), carefully add the tenders to the hot oil.
-
Fry for 3-4 minutes per side, until deeply golden brown and crispy, and the internal temperature reaches 165°F (74°C).
-
Transfer to a clean wire rack set over a baking sheet (this keeps them crispy on all sides). Do not place on paper towels, as they can get soggy.
Step 5: Season & Serve
-
While still hot, sprinkle the tenders with a tiny pinch of flaky sea salt.
-
Serve immediately with your favorite dipping sauces (honey mustard, ranch, BBQ sauce, etc.).
🔥 Air Fryer or Baked Option (For a Crispy, Less-Oil Method)
-
After dredging and letting the coating set on the rack, preheat air fryer to 400°F (200°C) or oven to 425°F (220°C).
-
Air Fryer: Spray or brush tenders lightly with oil. Cook in a single layer for 10-12 minutes, flipping halfway.
-
Oven: Place on a parchment-lined baking sheet. Drizzle or brush with ¼ cup melted butter or oil (this is crucial for browning). Bake for 15-20 minutes, flipping halfway, until crispy and cooked through.
Key Tips for Ultimate Crispiness:
-
Cornstarch is the MVP: The blend of flour and cornstarch creates a lighter, crispier crust than flour alone.
-
“Double-Dredge” for Extra Crunch (Optional): For an insane crust, after the first dredge, dip the floured tender back into the buttermilk marinade for a second, then back into the flour mixture for a second coat. This creates a super craggy, thick coating.
-
Oil Temperature is Everything: Keep it between 325°F-350°F. Too low = greasy, soggy. Too high = burns before cooking through.
-
Rest the Dredged Chicken: Letting the floured tenders sit for 10-15 minutes before frying helps the coating hydrate and stick, preventing it from sloughing off in the oil.
-
Use a Wire Rack, Not Paper Towels: This allows air to circulate, preventing steam from making the bottom soggy.
Serving Suggestions:
-
Classic: With fries, coleslaw, and dipping sauces.
-
As a Sandwich: On a toasted brioche bun with pickles, lettuce, and comeback sauce.
-
On a Salad: Sliced over a fresh garden salad.
-
As a Appetizer: Served with a variety of dips.
These tenders are guaranteed to be a hit—juicy on the inside, shatteringly crispy on the outside, and packed with flavor in every bite. Enjoy!
